Overview on how Clearstory & CMiC are integrated and how to set up the integration.
Integrating Clearstory with CMiC
Overview
CMiC is a leading construction ERP and project management software used by many of the largest construction companies in the world. The financial product tracks project budgets and enables project teams to track Potential Change Items (PCIs) and commit them to the overall budget once the change is approved.
With the Clearstory & CMiC integration project teams can:
1. Eliminate data entry: Because things are automatically logged in Clearstory when a trade partner submits, there is no COR line item data entry for GC project teams. With the integration, you can push something received in Clearstory directly into a PCI line item in CMiC forever eliminating PCI data entry.
2. Financial Visibility: By making Clearstory a project requirement and telling your trade partners all CORs must be posted in Clearstory for them to be valid, you now have a shared source of truth and can confidently have a real-time view at your COR exposure. With this integration, you can instantly see what CORs you have received that are not yet in a PCI in CMiC. This allows you to quickly filter Clearstory to see if your CORs have not yet been put into your forecast without any extra work.
How It Works
To push CORs from Clearstory, the integration must first be configured by a user having either an account owner role or an admin role for your office (see more on setting up the integration below). Once setup is complete, to push a COR into CMiC users must:
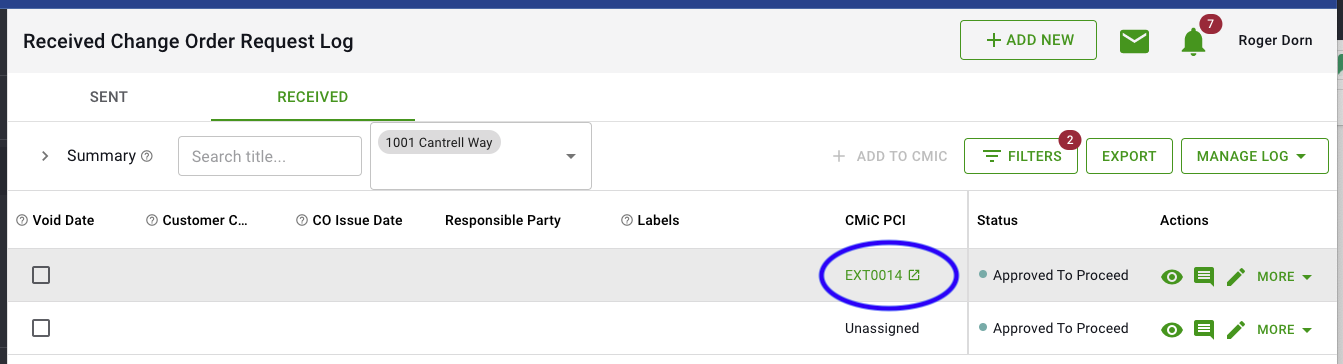
- In CMiC, create a PCI where the COR information from Clearstory will be written
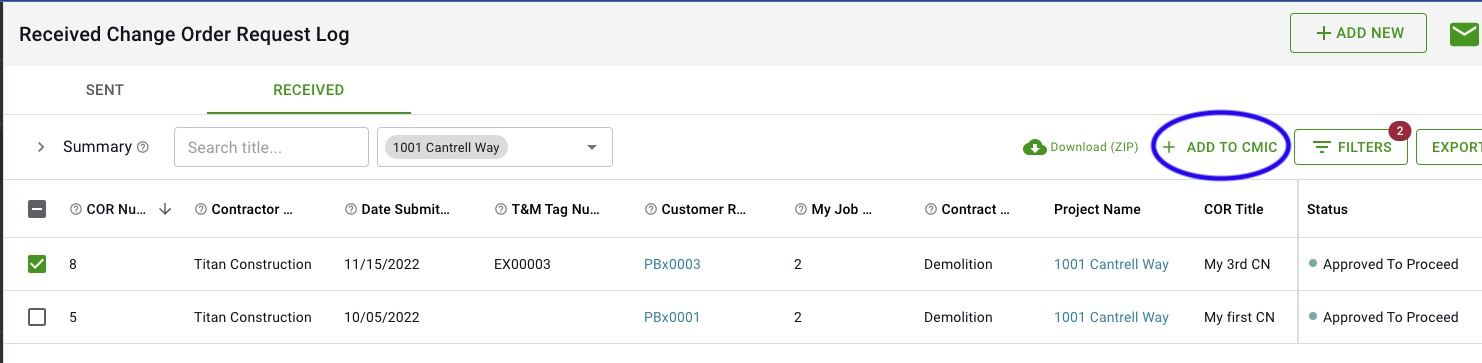
- In Clearstory, go to the COR log and select one or more CORs that you want to write to push to CMiC and click the Add to CMiC button at the top of the log
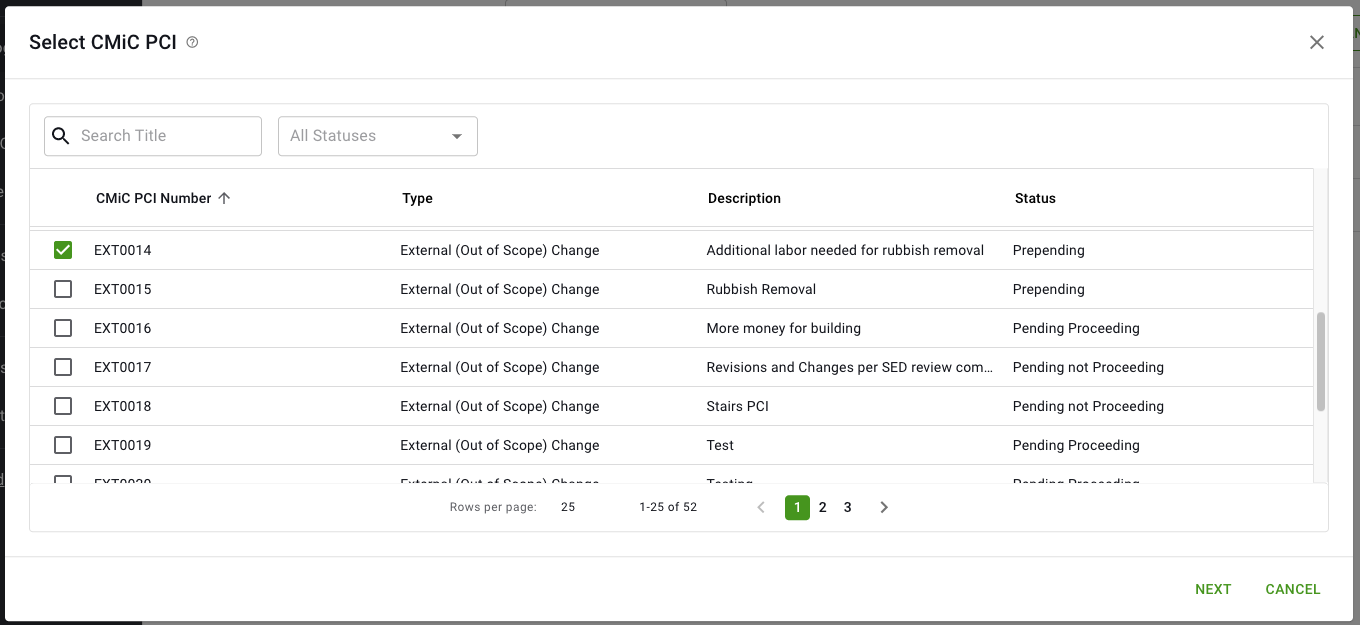
- The Select CMiC PCI dialog opens showing the available PCIs. Select the PCI created in Step 1 and click Next.
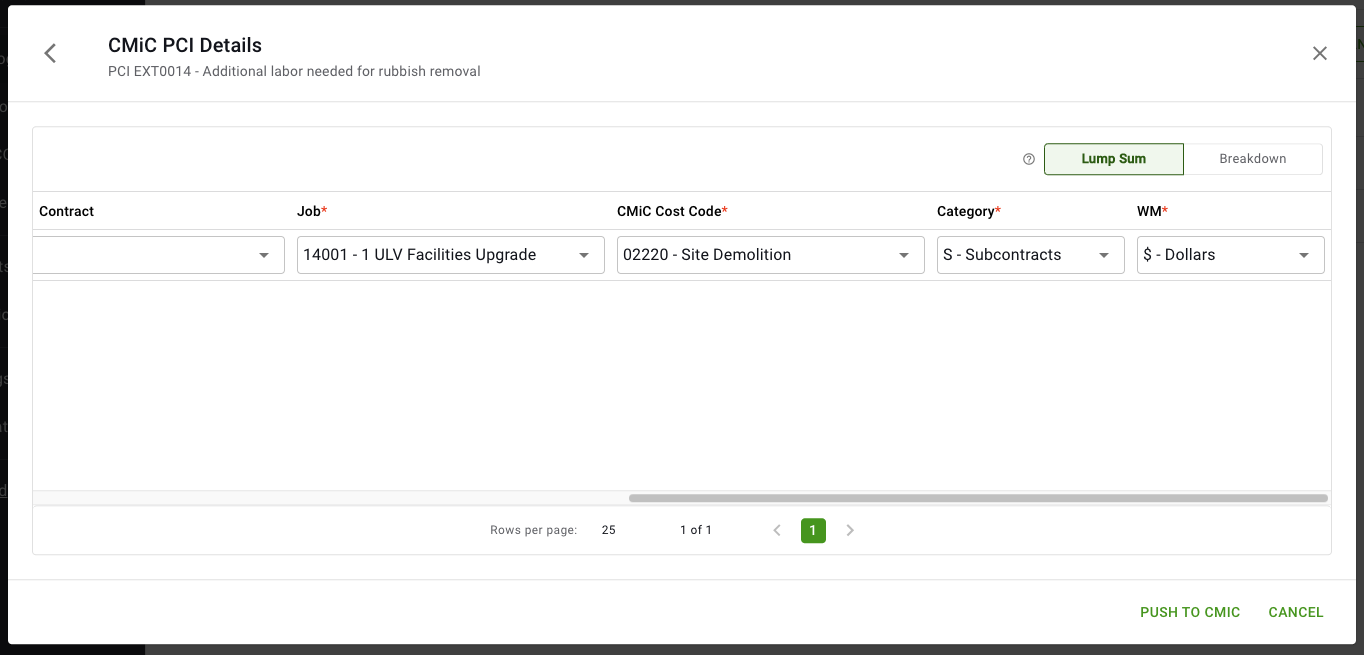
- Fill in the required PCI details and click the Push to CMiC button to add
- When the transaction is complete, the PCI number is added to the COR Log for future reference
CMiC Integration Setup
You will need the following information regarding your CMiC system:
- Check with CMiC via their salesloft ticket process to confirm you have the proper APIs to support this integration.
- Locate the URL you use to access your CMiC APIs
- The integration between Clearstory and CMiC requires a CMiC service account. Locate the Client ID (if used), username, and password used to authenticate the service account.
- If you authenticate through a third party provider we will need to
- Contact the Clearstory team at support@clearstory.build.
- We will need to install the above URL in your Clearstory account so the two systems can be connected.
- DO NOT share with us the service account credentials. You will enter this in your account following the steps below.
Once we’ve enabled the configuration on your account, the Clearstory integration with CMiC must be set up by either an Clearstory user having either an Account Owner or Admin role.
Sign on to your Clearstory account and navigate to Settings / Offices / <office name> page select the Office Integrations tab and click the Enable button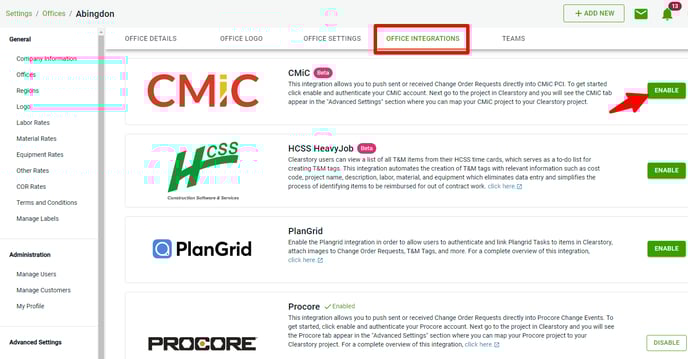
Once the integration is enabled, you will be prompted to enter the Serice Account Client ID*, user, and password.
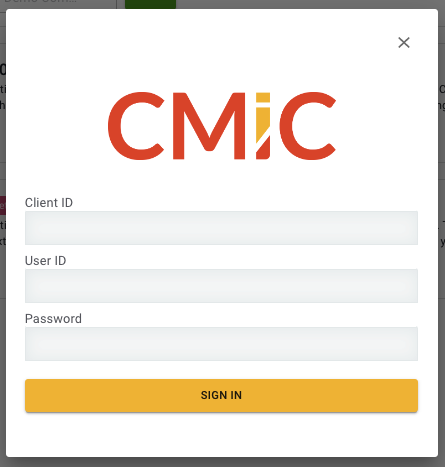
*Not all users will need to enter a client ID. If you normally do not use a Client ID to sign on to CMiC, then you can leave the client ID empty. If you do not know your client ID or you are unsure if you have one, contact CMiC to find out if you have one and what it is.
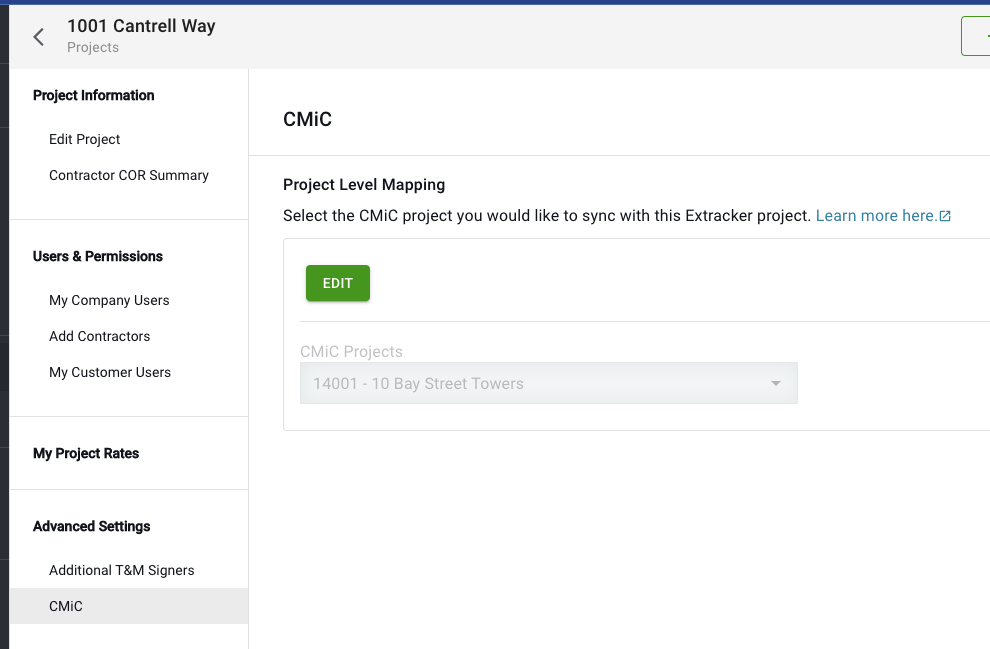
After you have successfully connected using your service account credentials, you need link your individual projects in Clearstory to the corresponding project in CMiC