Custom markups allow you to mark up individual line items on your Change Order Requests regardless of section
If you need to mark up certain line items but not others, such as an import duty on certain materials, our Custom Markups can help.
Creating a Custom Markup
A Custom Markup can be created either on the Account / Office level, or on the Project level. As with Rates, if you create a markup on the Account / Office level, it will affect the Project level markups, unless the Project has been customized.
Only Admins and Account Owners can create markups on the the Account / Office level

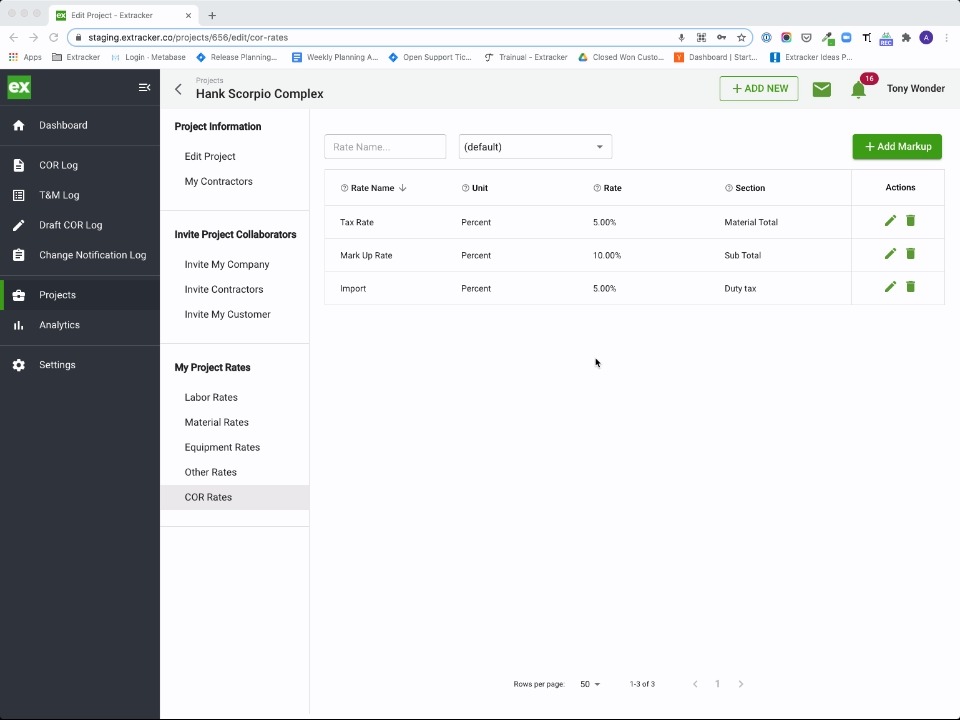
To create a Custom Markup on the Account / Office level, navigate to Settings > COR Rates > Click into the Rate Group you want to add the Custom Markup for.
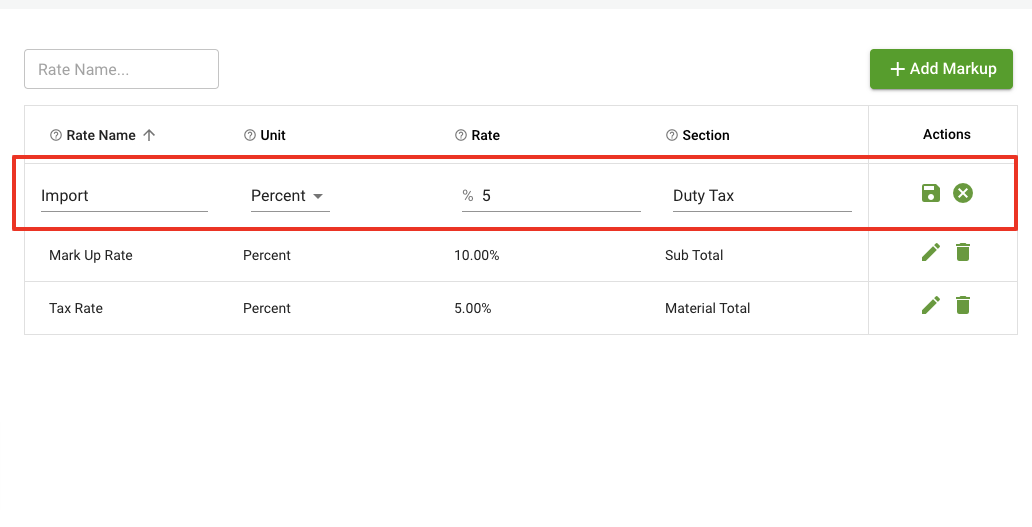
Then, click the green Add Markup button to input a new rate. Give it a Name, choose "percent" for the Unit, choose the Rate, and finally, instead of choosing an existing section, TYPE in the type of markup you want, then save.
To create a Custom Markup on the Project level, simply do the same under the Project Rates section.
Using a Custom Markup
Once you have created a Custom Markup rate, you can use it on any breakdown CORs for the Projects that markup shows up on.
First, create a breakdown COR by clicking on the Add New button, then selecting Create a Change Order Request.
Custom Markups can only be applied to breakdown CORs, not Lump Sum or Uploaded CORs
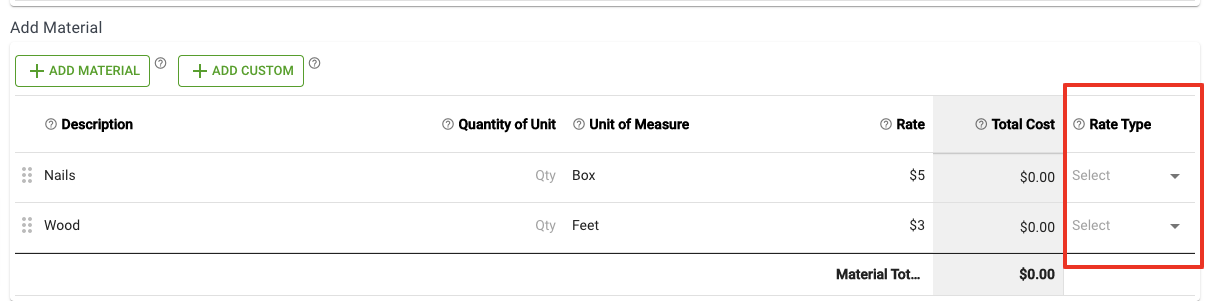
Choose a Project that has Custom Markups applied, and start to add your line items. You will see a Rate Type column displayed next to your line items that allows you to choose if you want to apply a markup to that item:
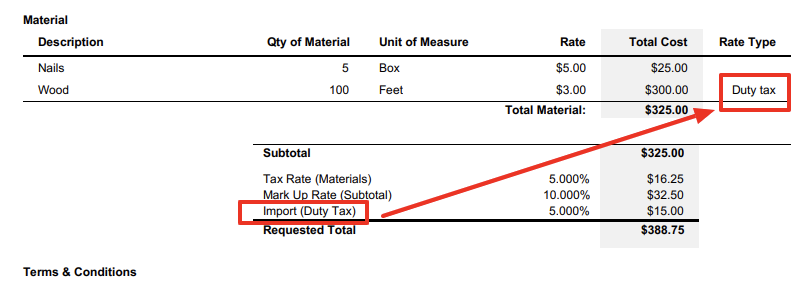
You can apply any Custom Markup to any line item, but only one markup per line item. In the summary, you will see the amount calculated for the markup along with the Rate Type that is tied to each line item:
This video walks through the process as well: