
Learn the basics of how to use the Clearstory digital COR Log
Clearstory's digital COR Log is designed to eliminate the tedious back and forth of an excel or PDF COR log that get's emailed between parties. Clearstory's digital COR Log get's updated in real time and all changes are tracked in the activity feed as an audit trail for both parties.
Table of contents:
- Sent vs. Received COR Log
- Understanding the COR Log columns
- How to filter the log
- How to export and download contents
- Managing the log appearance
Below is a quick video. Otherwise you can follow the steps below:
1. Sent vs. Received COR Log
The first thing to understand is that you can both send and receive COR's in your Clearstory account. This way you can invite your customer to Clearstory to send them project CORs and you can invite your contractors to send you CORs.
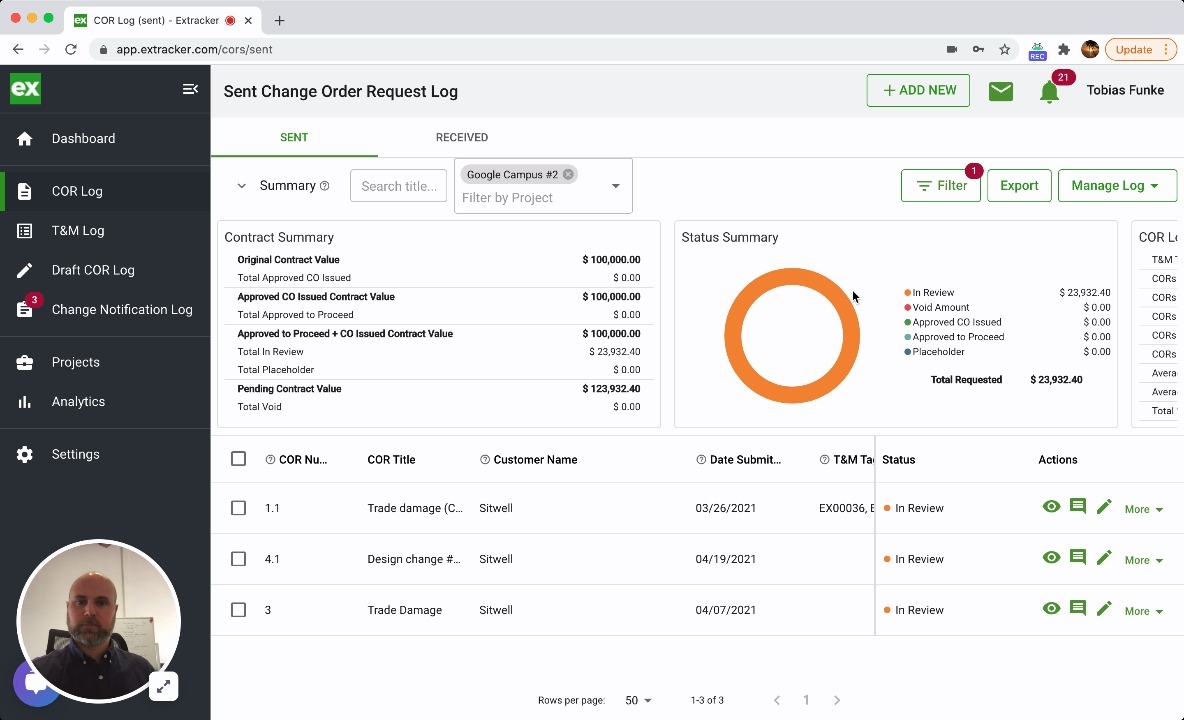
- Sent COR Log: Anything you send through Clearstory to your customer will be logged in the Sent COR Log.
- Received COR Log: Anything one of your Contractors send TO YOU will be logged in your Received COR Log.
You can quickly toggle back and forth between the two logs here.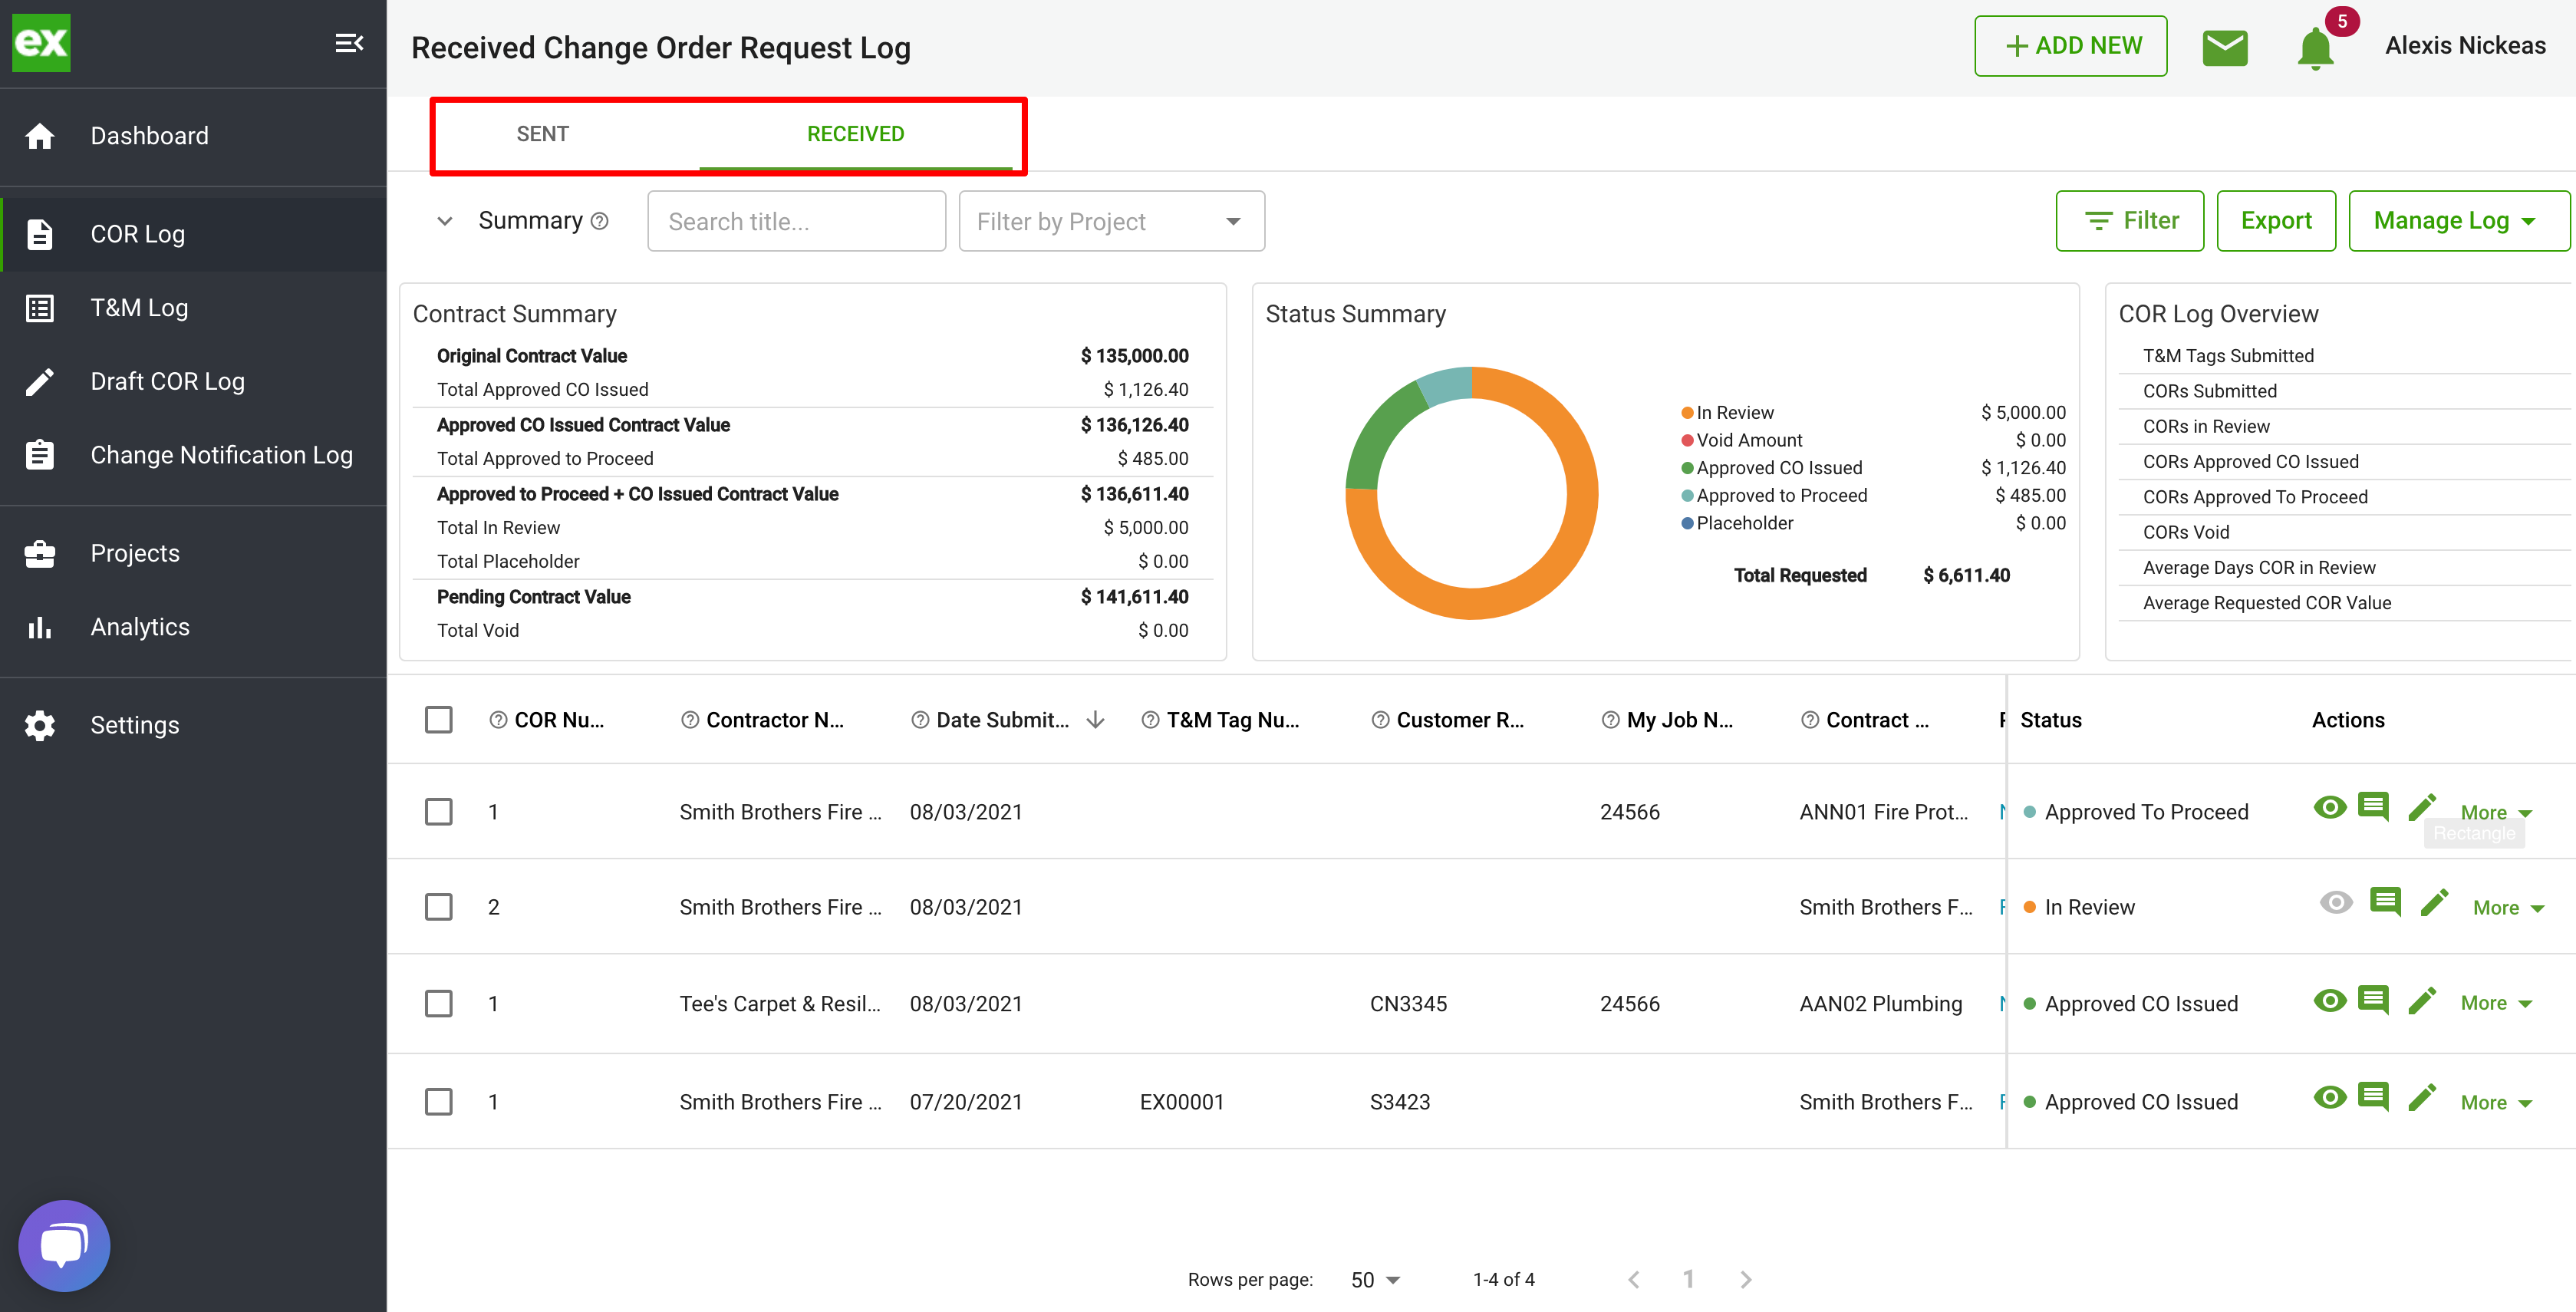
2. Understanding the COR Log columns
The Clearstory COR log uses a standard industry best practice layout designed to keep all parties on the same page. Here is a quick rundown of what is contained in each column.
- COR Number: When sending a COR the system will automatically generate a COR number starting at 1 for each project. Contractors can customize this in case the project requires a unique numbering system.
- Contractor/Customer Name:
- If you are viewing the Sent COR Log you will see the companies name that you sent the COR to listed as "Customer Name".
- If you are viewing the Received COR Log you will see the companies name that sent you the COR listed as "Contractor Name".
- Date Submitted: This is the date the COR was originally sent. This field is editable in case the COR was originally sent outside of Clearstory and the log is being updated after the fact. Any changes to the date field can be tracked in the Activity field.
- T&M Tag Number: If the COR was generated from work Tracked on a Time and Material basis the corresponding T&M Tag number (Field Work Order, Extra Work Authorization, EWO, etc.) can be listed here. This can be manually entered when adding the COR or selected from a Clearstory created T&M Tag.
- Customer Reference Number: This is the number that the customer (General Contractor) uses to track the COR. This is often referred to as a PCO, PCI, CE, etc. number.
- My Job Number: This is the number your company uses to track your project and is controlled from the project details page.
- Project Name: The name of the project related to the COR.
- Requested Amount: This is the originally requested amount of the COR. This field can only be changed by having the sender submit a revision to the COR. If the amount get's negotiated you can edit the status amount.
- Status: The COR status is broken down by the following:
- Approved CO Issued: This status is used to help both parties understand that a COR has been approved and the corresponding CO has been issued so the contractor can bill for the work.
- Approved to Proceed: This status is used to show that a contractor is proceeding on work based on the assumption that it is approved (verbal or written) but an official CO has not been issued.
- Void: Once a COR is rejected or determined that it won't be proceeded on this status is used to mark it as such.
- In Review - By default, all new CORs go into the "In Review" category. Because there are many different stages under review, it is good practice to have an additional column identifying what stage the COR is in.
- Pricing - The COR is currently being priced and the current version is a placeholder.
- On Hold - If a COR is on hold awaiting a decision.
- Revise and Resubmit - If something needs to be adjusted in the COR.
- Rough Order of Magnitude (ROM) - This is a placeholder estimate while the work is either being priced out or proceeded on T&M.
- Owner Review - If the GC has already reviewed but now the owner is reviewing.
- Potential Change Order - Something being tracked that might have a cost impact at a later date.
- Placeholder: Placeholder status can be assigned if a COR is not yet formally submitted for review but both parties want to forecast the cost on the COR log.
- Approved/Void Date: This is the date that the COR was either verbally told it was approved or rejected. This is NOT the date the CO was issued.
- Customer CO Number: For a COR to be approved and ready to bill the customer must issue a formal signed Change Order updating the contract value. Typically multiple CORs will be included in one signed Change Order so the associated CO number can be tracked with each COR in this column.
- CO Issue Date: This is the date the signed Change Order was issued.
- Labels: Labels are an easy way to track different buckets of money within a COR log. For example, you may want to track overtime, trade damage, design changes, etc. You can easily create a label and assign it to that COR. Once assigned you can filter the log for each label. **This column can only be seen by your company and is not visible to your contractors or customers.
- Action column: This column is where you can perform different actions on a COR.
- View Icon: This will open the associated PDF of the COR file.
- View Revision: This will open a page showing all the revisions of that COR.
- Submit Revision: This is only visible on the Sent COR log and gives the user the ability to Submit a Revision to a COR.
- Resend COR: This is a quick way to resend a copy of a COR to anyone.
3. How to filter the COR Log
You can easily filter the COR log in a variety of ways. To see all the filters, click on the "Filters" button in the top right of the COR Log Page.
- You can filter the log by the following items:
- Projects
- Contractors / Customers
- Job Number
- Customer Reference Number
- Status
- Stage
- Date Submitted
- COR with T&M Tags or Estimated CORs
- Regions (Sent T&M Log only)
- Offices
- Users (Sent T&M Log only)
4. How to export and download log contents
- At any time you can export the log to PDF, Excel or CSV and the system will download a fully formatted COR log ready to be printed or edited. To export click, the Exports button in the top right-hand corner.
- Another way to share the COR log is to generate a shareable link. You can email this link to your customer and it will automatically update every time a revision is made to the log in Clearstory. Your Customer DOES NOT have to be using Clearstory to open this link.
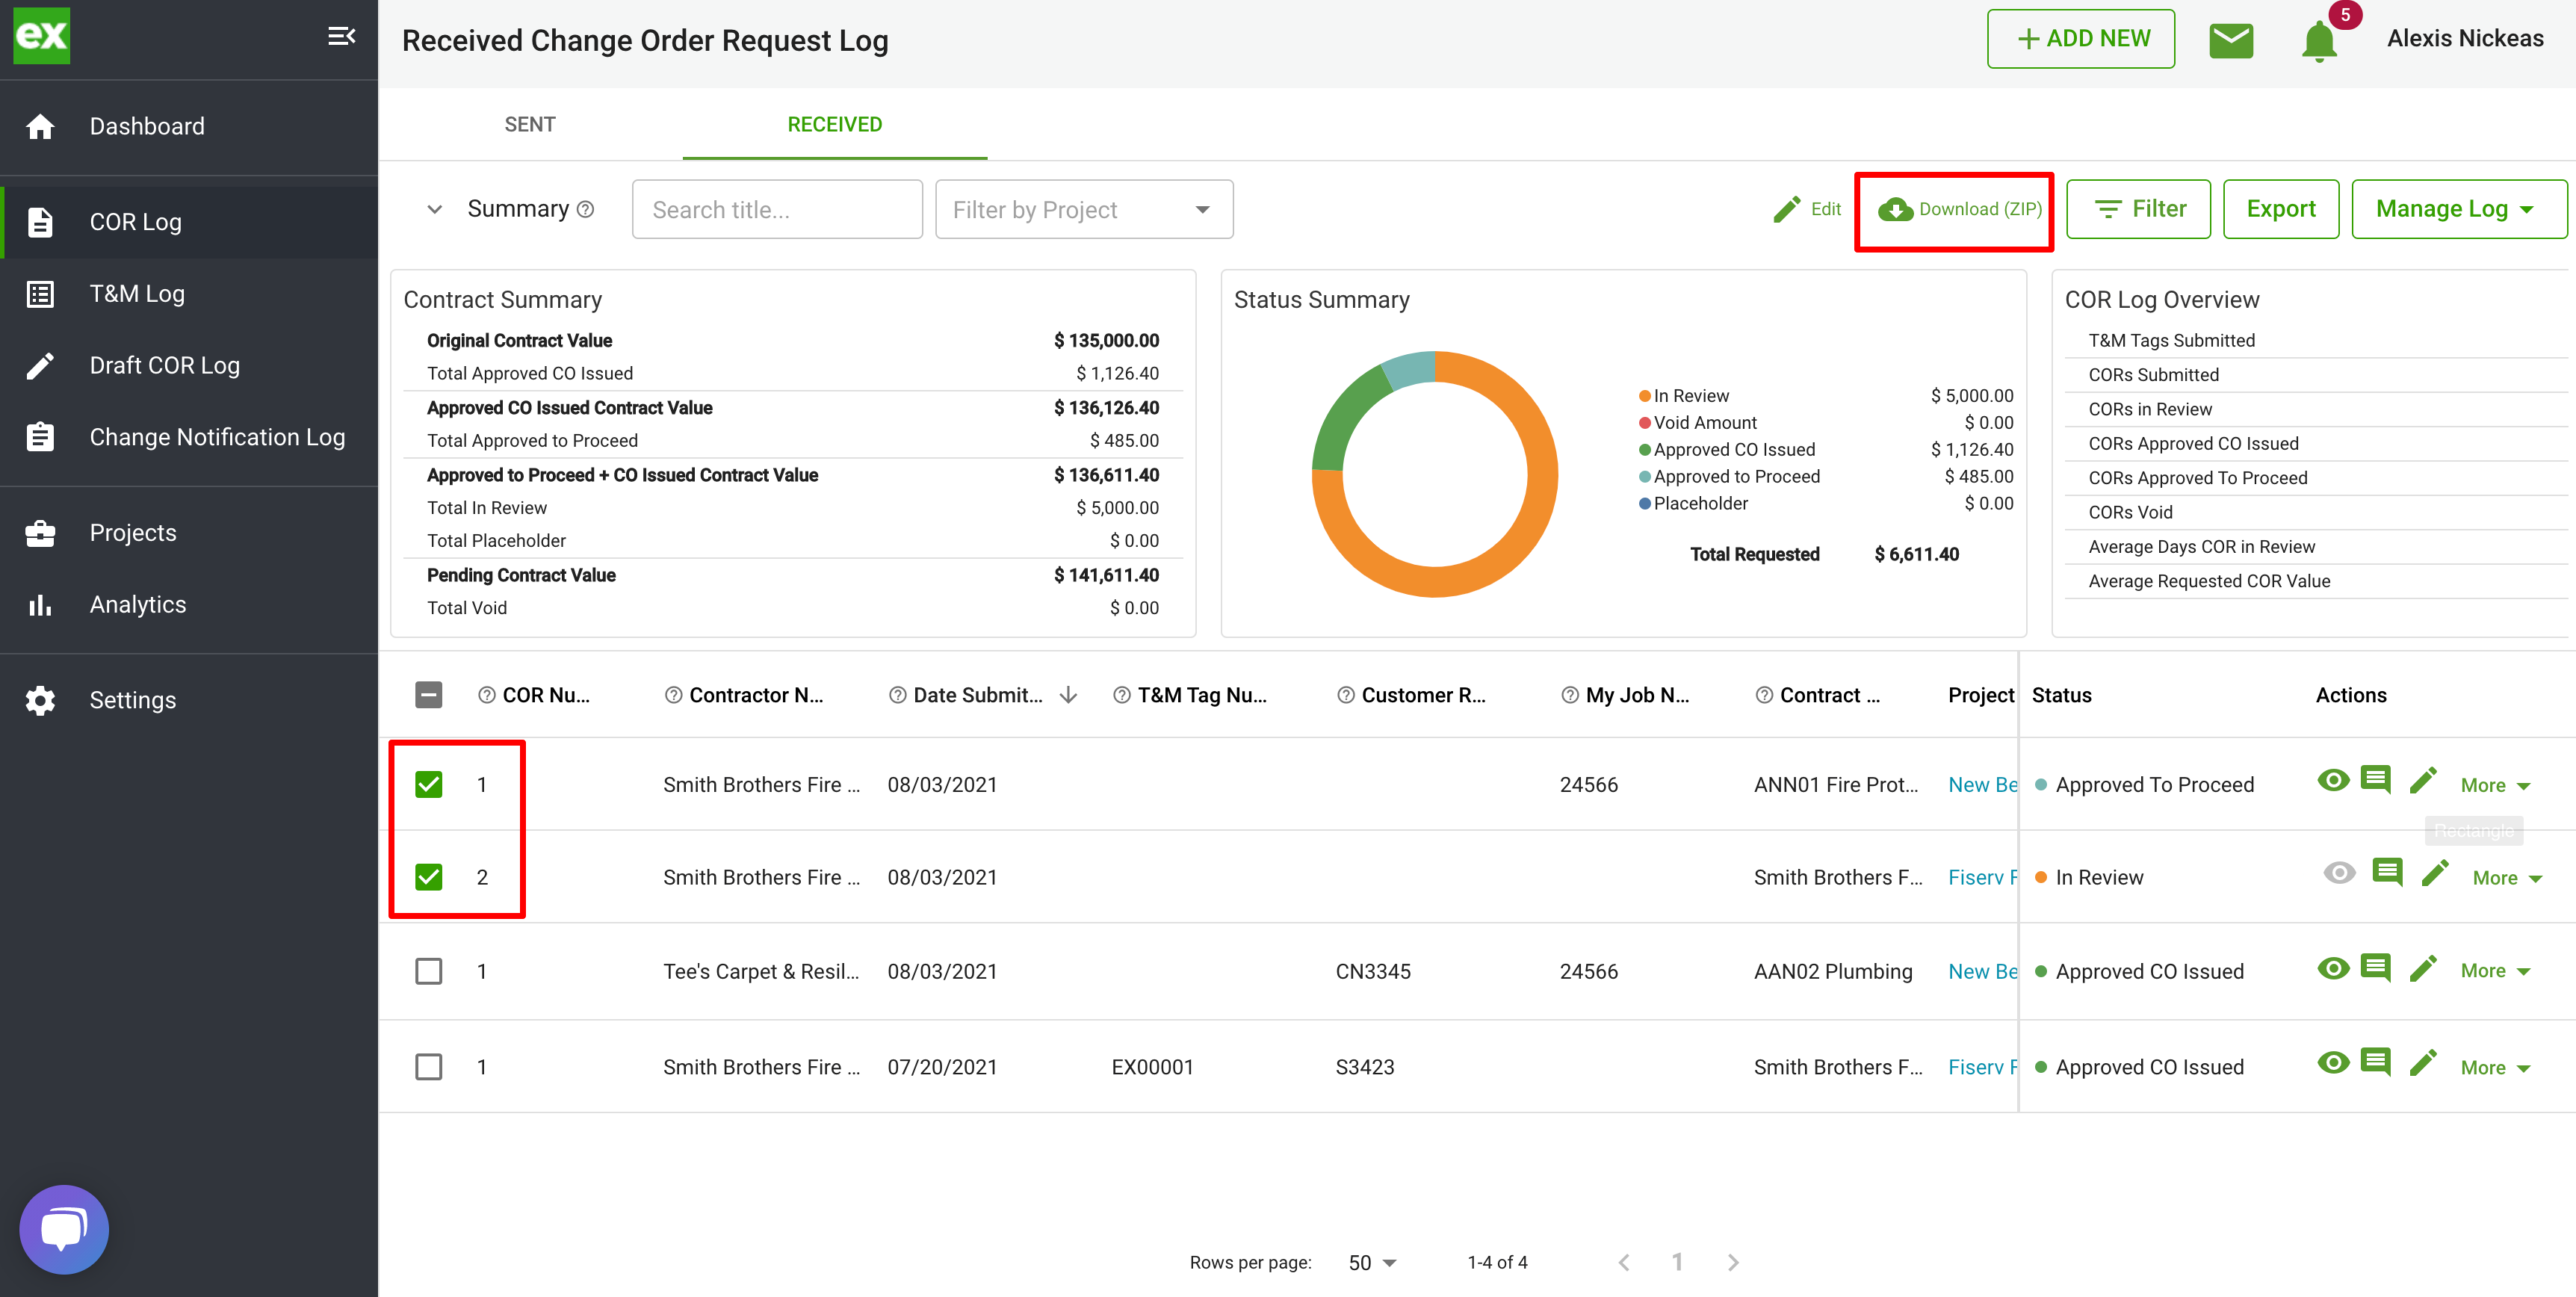
- You can also bulk download all COR PDF files by checking off the line items in the left hand column and clicking the download icon.
5. Managing the log appearance
There are several ways you can manipulate what you see in the Clearstory log.
- You can expand and shrink columns by selecting the edge of the column in the row header.
- You can select which columns you would like to see visible by clicking the Manage Log in the top right corner.
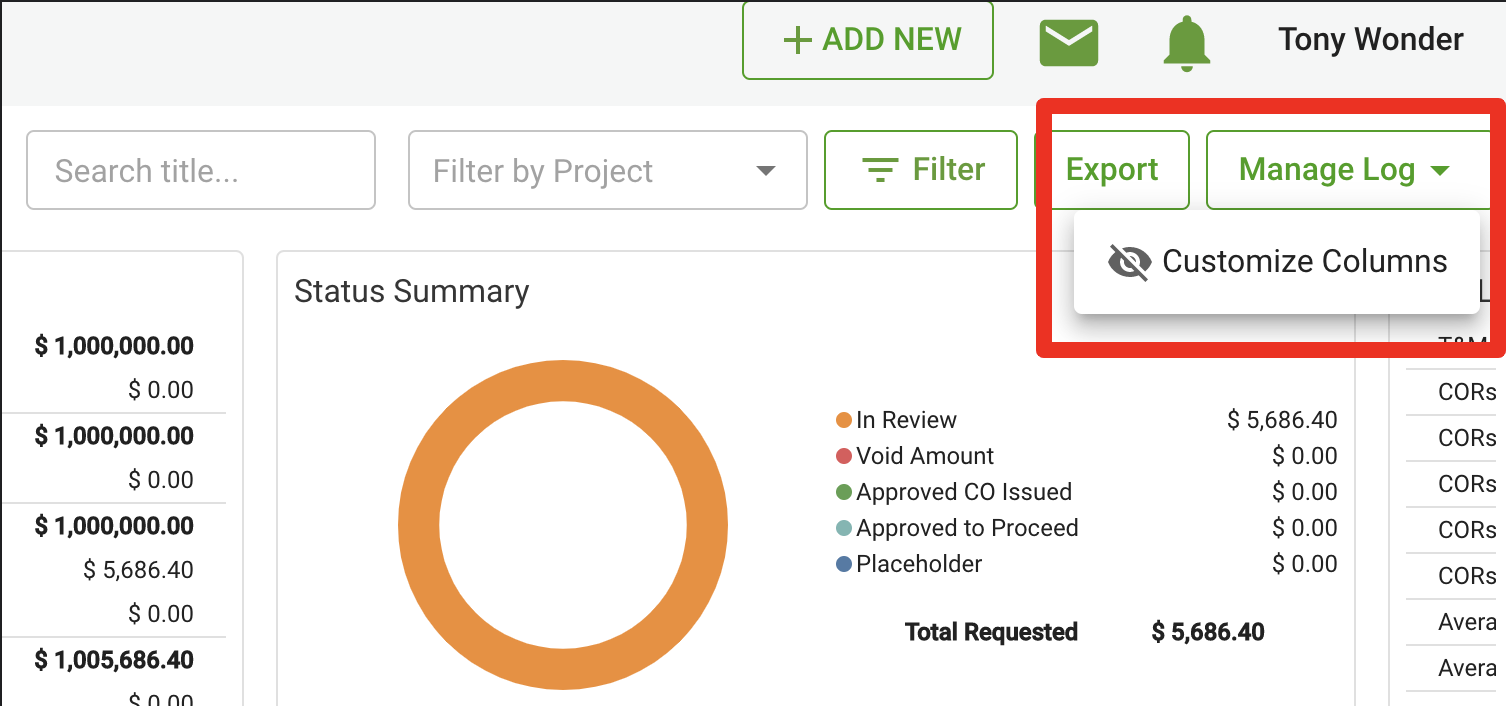
- You can then choose which columns will display for all Projects, or drill into the specific Project to customize. Once you have the columns set, click “Save”
-png.png)
This guide has more details on managing your log's columns!