
In this article, you will learn the fastest way to set up your Clearstory account, so you can use Clearstory with your General Contractor.
Table of contents
- How to Sign Up
- How to Upload a Change Order Request
- How to Navigate the COR Log
- How to Create a Time and Material Tag
- How to Respond to a Change Notification
1. How to Sign Up
There are two basic ways you can sign up for Clearstory.
- If you were invited by your General Contractor, you will receive an email inviting you to the project. In this email, you will see a link that says "Join Project". Click on this link and it will take you into the account sign up workflow.
- If you were invited but missed the email, you can still sign up directly from the Clearstory website. Simply to go Clearstory.build > Log In > Enter your work email address.
For an in-depth overview of how to accept a project invite, check out this article: How to Accept a Project Invite.
2. How to Upload a Change Order Request
Uploading a COR is a free feature in Clearstory and only takes a few seconds. Here is how to quickly upload a COR:
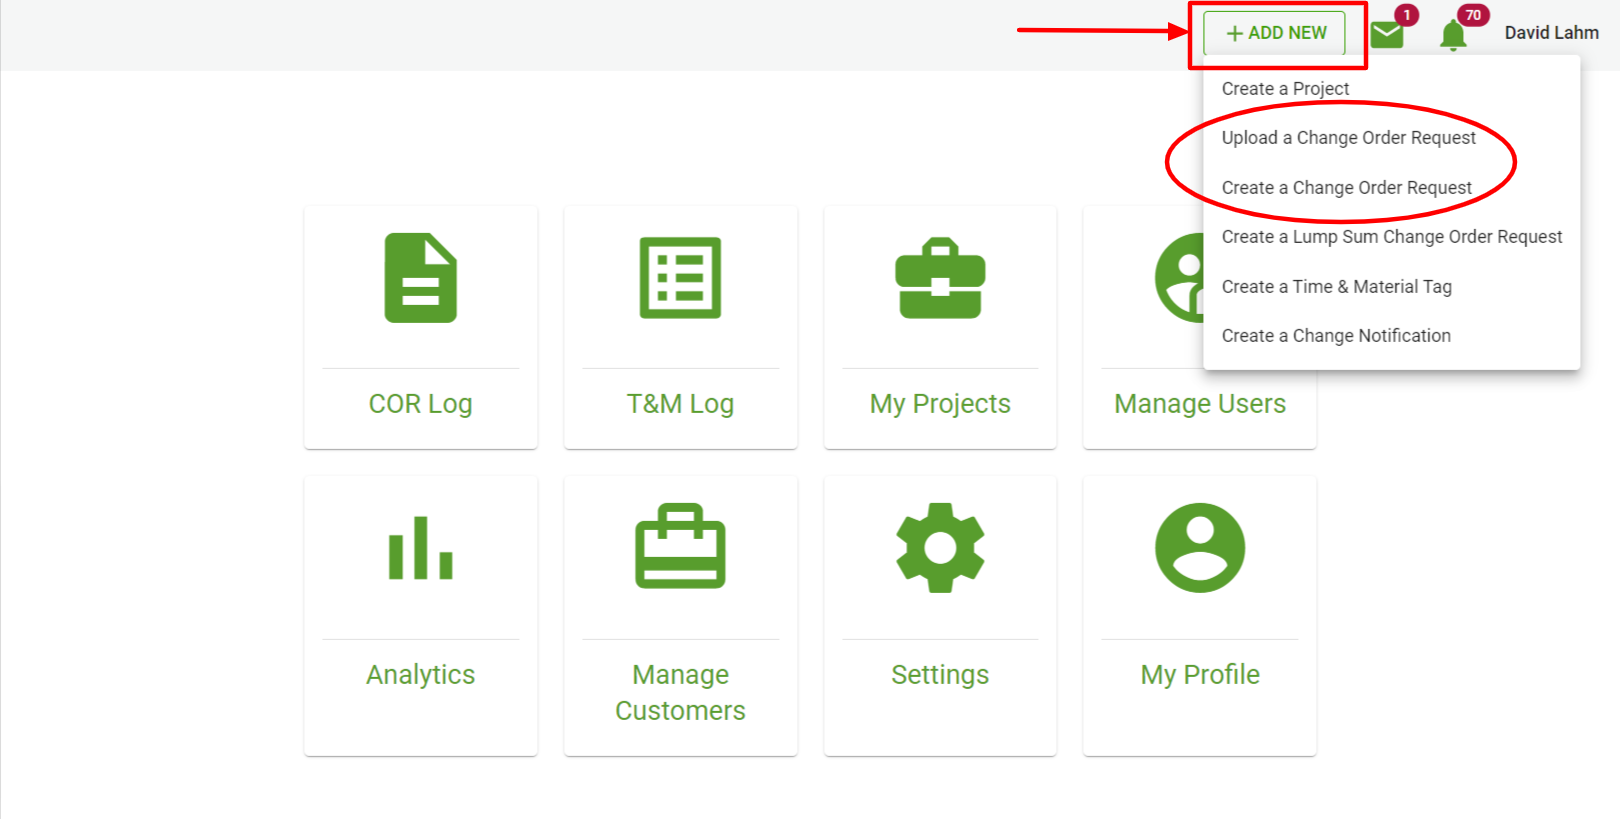
- From any page in the application, click on + Add New in the top right section of the screen. This will give you two options:
- Upload Change Order Request: Use this option if you have a pdf of your COR already. Uploading a COR to Clearstory's digital COR log is a free feature that allows you to simply drag and drop your PDF COR file and share it, along with some basic details, with your customer.
- Create a Change Order Request: This is a paid-for feature in Clearstory (unless you were invited by a General Contractor) and allows your company to quickly create a Change Order Request using Clearstory's template. Check with your General Contractor if using an Clearstory COR template is a project requirement. For more detail please see link: How to Create a Change Order Request in Clearstory.
- Click on Upload COR.
- Select the project you want to upload the COR for and fill out the required fields. To see a more in-depth overview of this check out this article here: How to upload a COR.

3. How to Navigate the COR Log
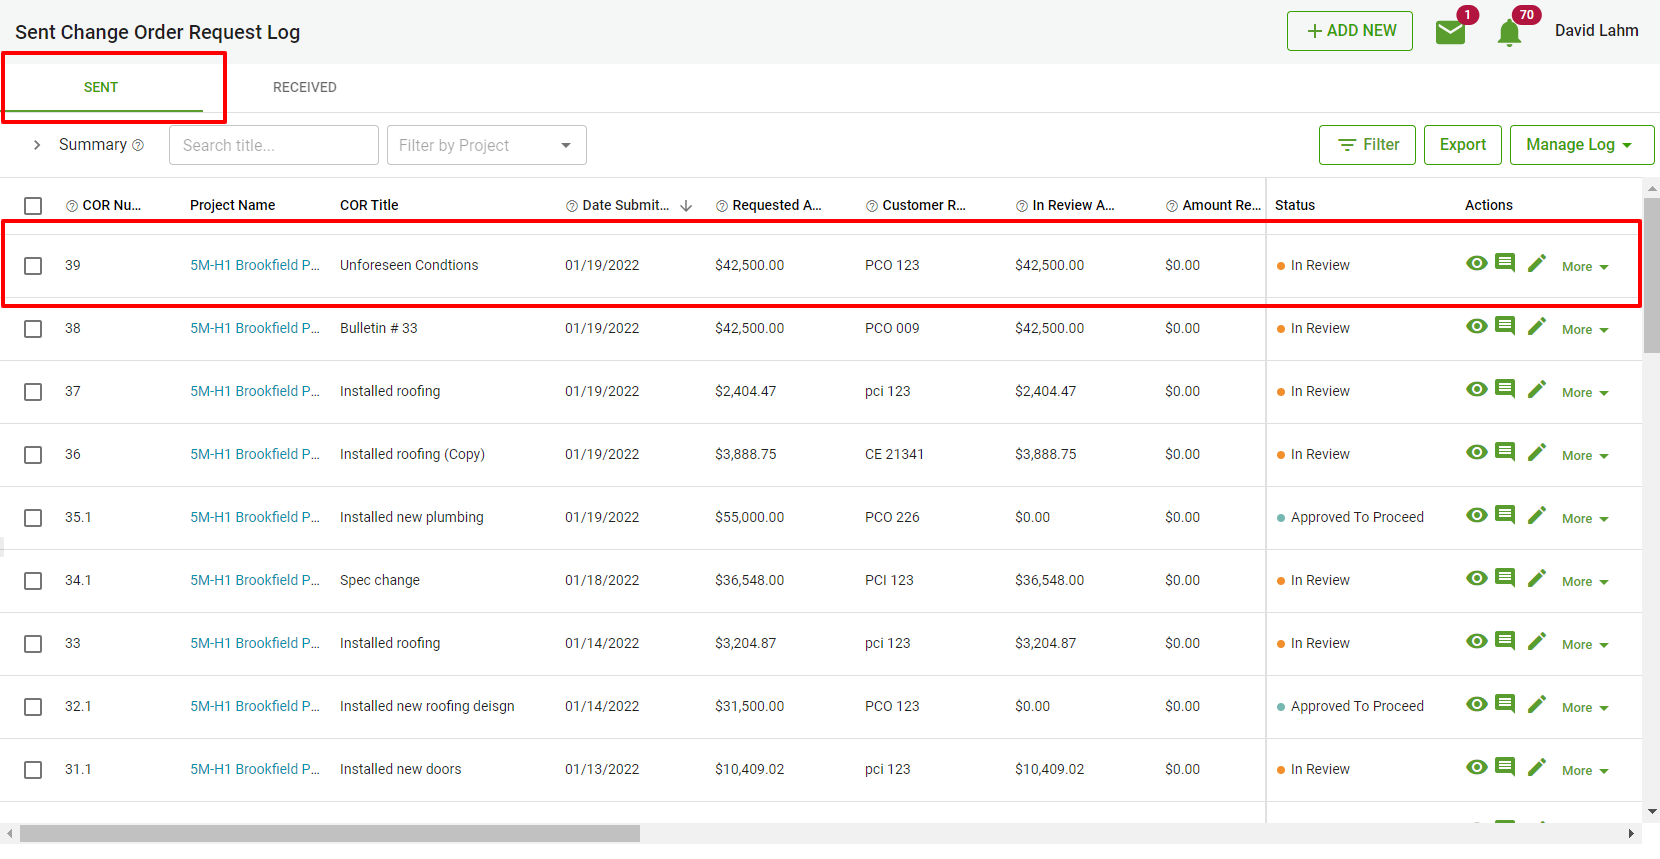
Once your COR is uploaded it will be added to your Sent COR Log in Clearstory. It will also be visible with your General Contractor once it is added to the log.
- To navigate to your COR Log click in the left-hand navigation bar click on COR Log > Sent COR Log.
- Any COR you have uploaded or created in Clearstory and sent to your customer will automatically be added here.
For an in-depth guide on how to navigate the COR log, check out this article here: How to navigate the COR log.
4. How to Create a Time and Material Tag
Clearstory has a free mobile app that gives contractor's the ability to create professional-looking Time and Material Tags directly from their mobile device. Digital Time and Material Tags benefit everyone:
- Subcontractor can clearly document their additional work to protect their revenue.
- General Contractor's can instantly forecast and log any signed T&M Tag to see their exposure at all times.
- Project Owners can be shown project costs in near real-time and can finally understand what they are paying for with photo documentation and easy to read PDFs.
How to create a T&M Tag:
- The first step is to download the Claerstory mobile app which is supported on iOS, Andriod and tablets.
- To log in, simply use the same email and password you used to create your Clearstory account.
- Once logged in you can do the following:
- View all created T&M Tags
- View all CORs you uploaded or created
- Create a new Time and Material Tag
Once you are set up with the mobile app check out this article for an in-depth guide: How to create a Time and Material Tag using the Mobile App.
5. How to Respond to a Change Notification
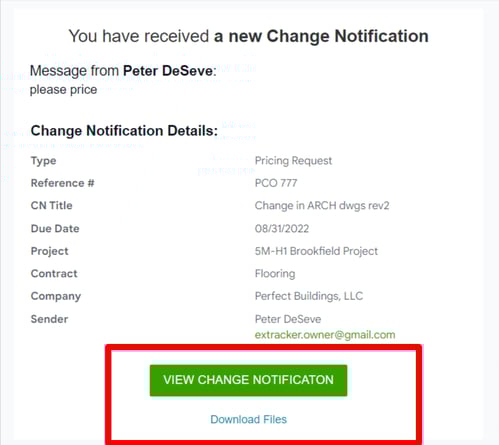
Your General Contractor might use Clearstory's Change Notification feature to distribute pricing exercises like Bulletins, Addendums, Design Drawings, ASI's, etc. Here is what you will see:
- You will receive an email with a link to view the files that contain the changes to be reviewed.
- To view the Change Notification you will log in to the Clearstory web application and navigate to Change Notification Log > Received Log.
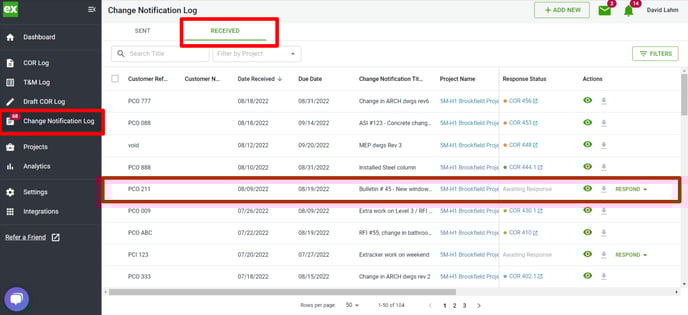
- From this page, you can do the following:
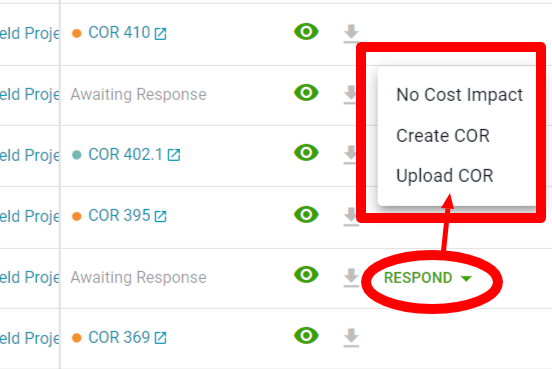
- Respond by clicking on the "Respond" link located on each line item where you will be given three options. You can respond with the following:
- No Cost Impact: If the change does not effect your scope of work you can quickly respond by saying no cost impact. This will notify your general contractor there is no cost impact and a COR will not be added to your log.
- Upload COR: If you select upload COR, you can drag and drop your associated cost impact in response to the change.
- Create COR: You can respond by creating a Change Order using one of Clearstory's COR templates.
- View and download the documents you were sent.
- View the details.
- Respond by clicking on the "Respond" link located on each line item where you will be given three options. You can respond with the following:
For an in-depth guide on Change Notifications check out this article here: How to respond to a Change Notification.
If you have any questions along the way please contact us!
- For quick questions, message us directly in the chatbox at the bottom left-hand corner of every page.

- If a Success Manager reach out to you from a GC Project that is requiring Clearstory, please reach out to them directly for a quicker response.
- To contact our sales team feel free to schedule a call on our calendar here.